Configuring Alerts
Splunk has a powerful alerting system that can be used to send emails or run arbitrary commands whenever a specific condition is met, as defined in a Splunk search.
In this walkthrough, we demonstrate how to alert when the duration of user logons exceeds a certain threshold.
Defining the Condition
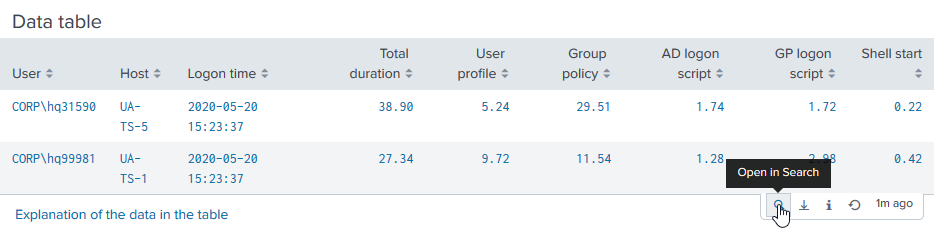
An easy way to find the right Splunk search for defining the alert condition is to use an element already present on one of uberAgent’s dashboards. In this example, we are interested in logon duration which is displayed on the User Logon Duration dashboard.
Navigate to the table near the bottom and click the button with the little lens symbol on it:
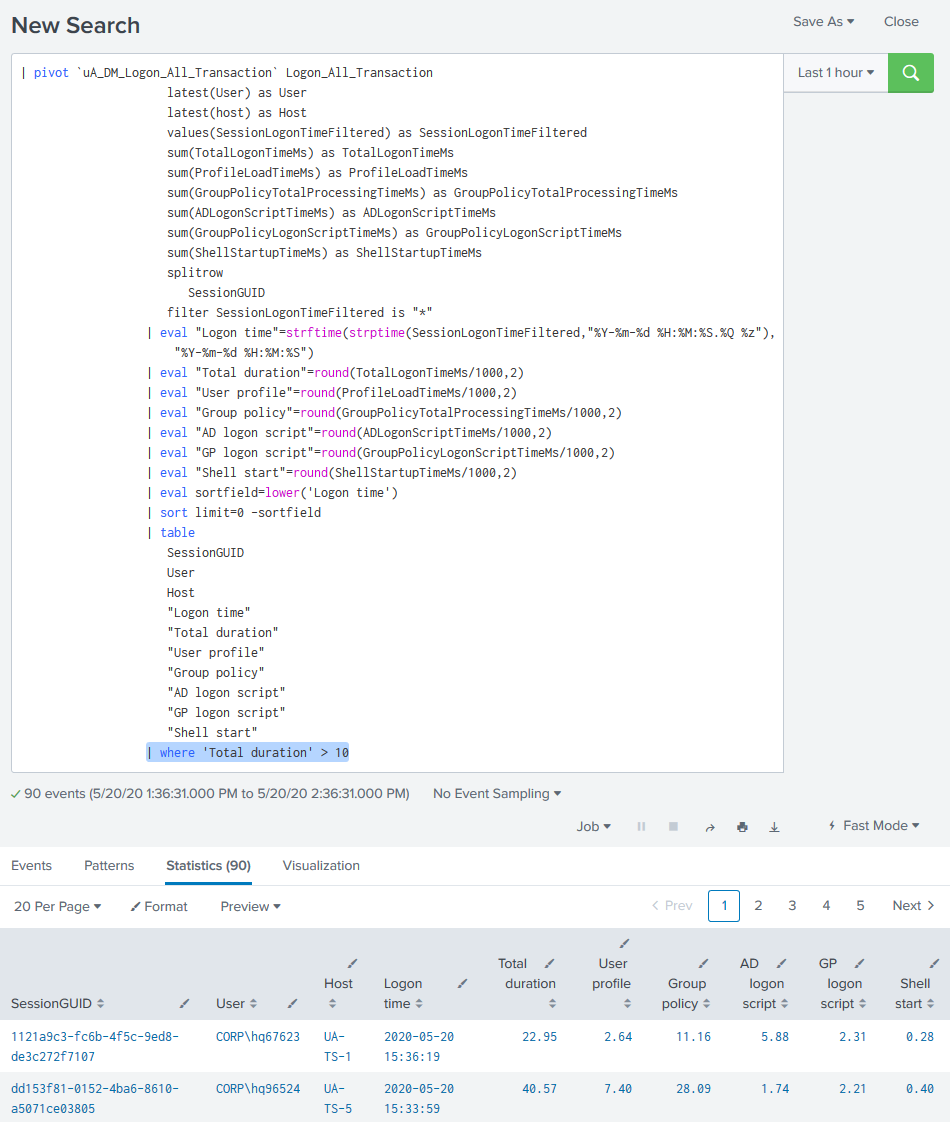
This opens the search in another window. At this stage you can add a condition (highlighted below) to filter for specific events:
Setting up the Alert
Once you are happy with the results returned from your conditional search, copy the search string.
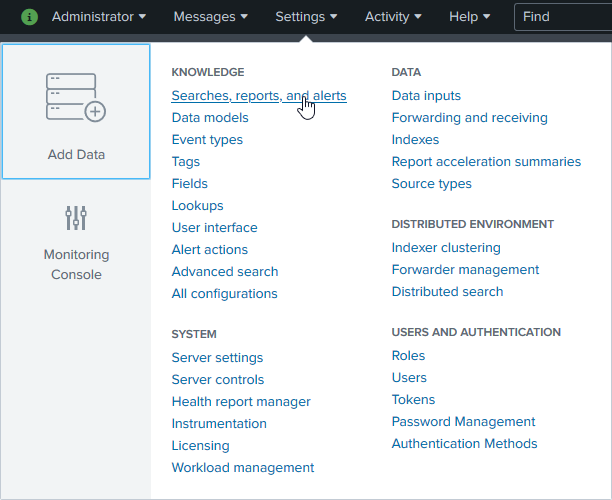
Click Settings > Searches, reports and alerts:
Click New Alert:

Configure the alert as shown in the following very large screenshot:
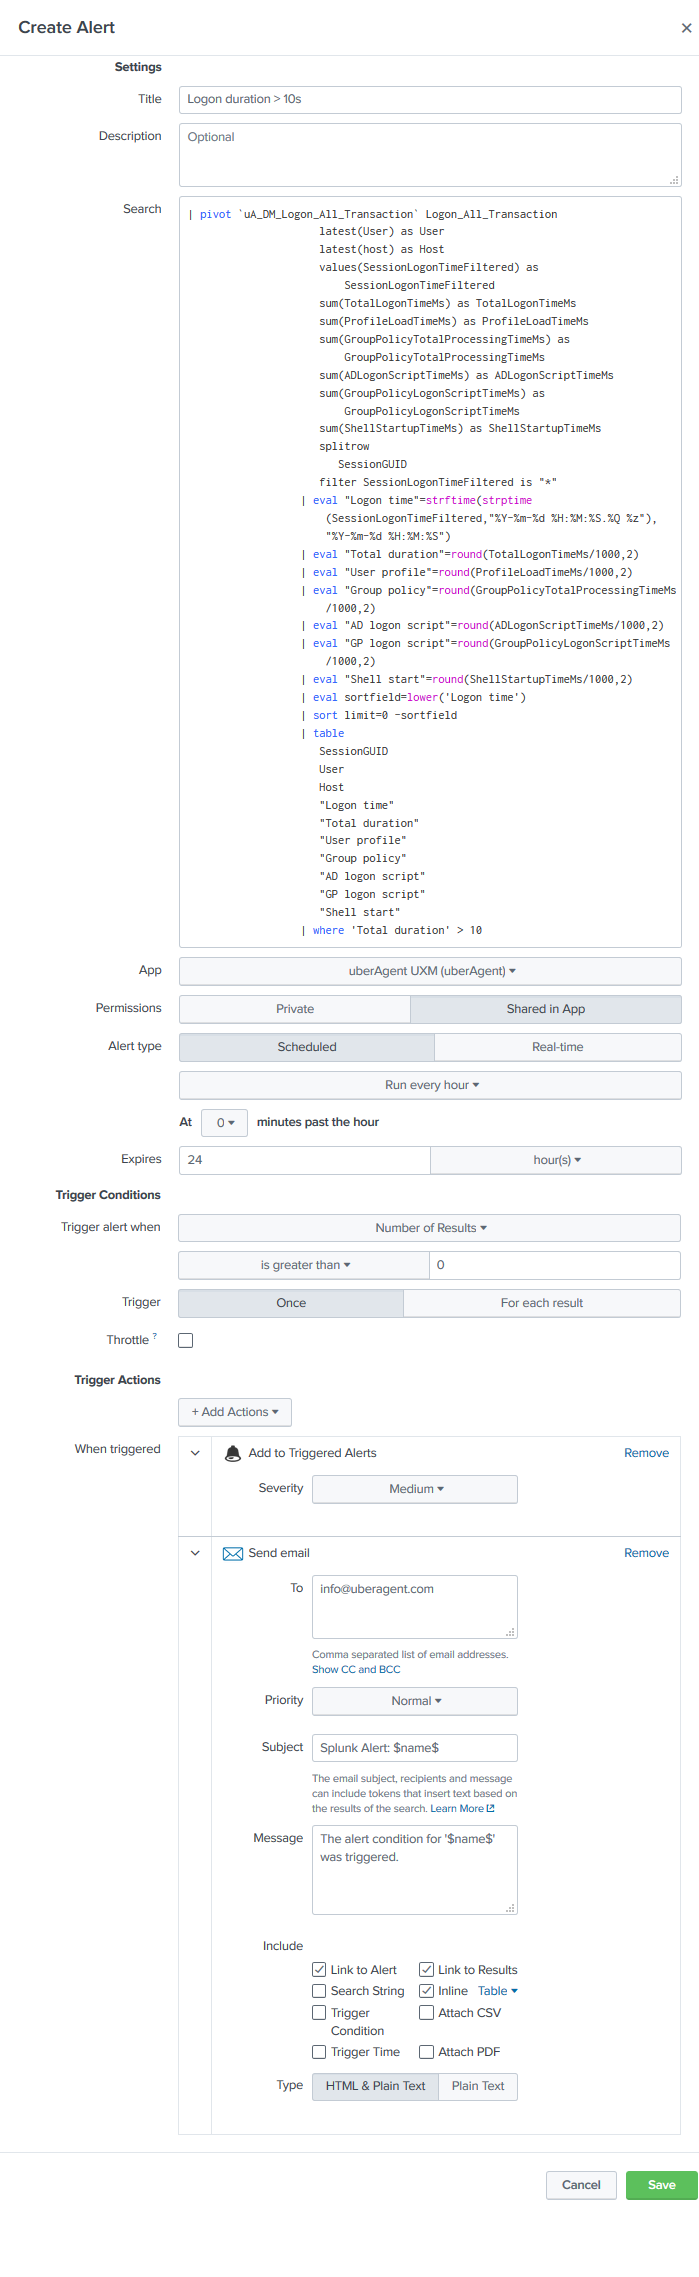
Specify email addresses for the email trigger action. It might also be a good idea to check Inline so that you get the actual data causing the alert right in the email.
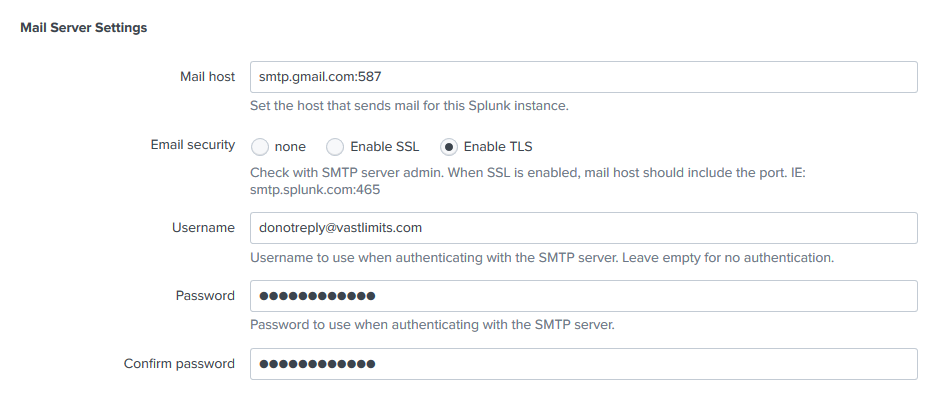
Configure Email Alerting
To configure alerting via Email go to Settings > Server settings > Email settings.
The following mail server settings apply to Google Apps:
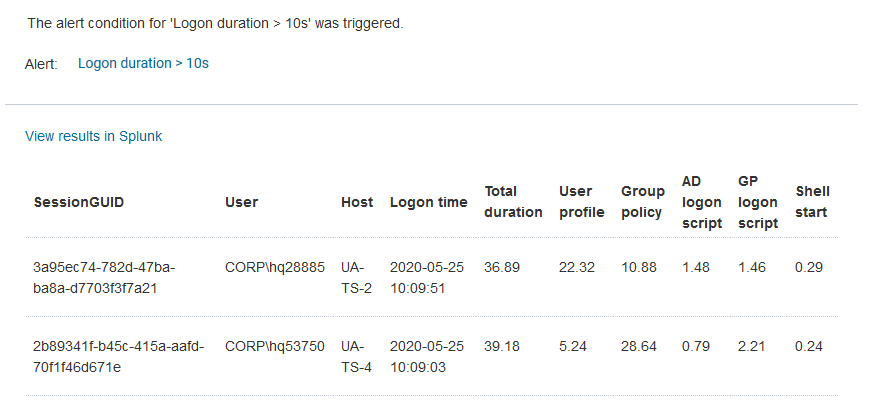
The Resulting Alerts
With that, you are all done. With the sample configuration you will receive an email like the following whenever a user logon takes more than 10 seconds:
You can also see all alerts in Activity > Triggered Alerts:
