Installing Splunk
This page explains how to install a Splunk server for uberAgent.
Prerequisites
- Download Splunk
- Please see the KB article supported Splunk versions
Setup
Run through Splunk’s setup on the designated Splunk server (in this simple tutorial we assume that you only have a single, Windows-based Splunk server). Choose Local system user when asked for a Splunk user.
Firewall
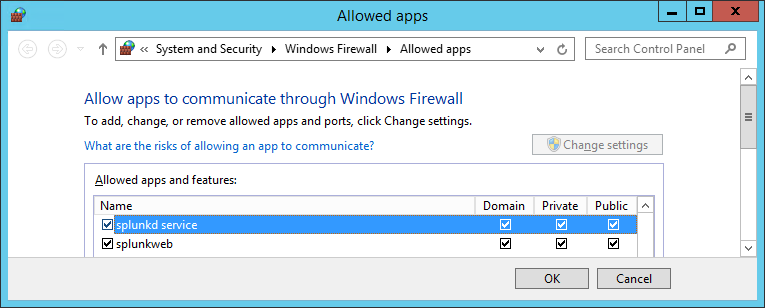
Once Splunk is installed: if you have a firewall enabled, make sure that communication is allowed for splunkd.exe and splunkweb.exe (both normally located in C:\Program Files\Splunk\bin). For Windows Firewall the recommended configuration looks like this:

Log On
Log on to the Splunk console by navigating to http://servername:8000 in your browser.
License
If you plan to use Splunk Enterprise and already have a license, install it through Settings > Licensing. If you do not have a license yet: Splunk runs in Enterprise mode with an allowed daily data volume of 500 MB for 60 days. Then it switches to the free version.
Sending to Splunk’s HTTP Event Collector
If you plan to have the endpoint agent send the collected data to Splunk’s HTTP Event Collector follow the steps in this article.
Install uberAgent
Read on about how to install uberAgent.